Why You Need Cinematic Moves
The difference between a “nice drone video” and a truly cinematic shot lies in the intention behind the movement. Every cinematic move has a purpose: to reveal, to focus, to build tension, or to convey scale. In practice, this means you don't fly randomly — you plan every shot before the drone even takes off.
Modern drones like the DJI Mini 4 Pro (from ~€700 / ~$759 for the base unit, or ~€1,010 / ~$1,099 for the Fly More Combo with RC 2) provide tools that massively simplify this process. The Cruise Control feature locks flight speed, reducing the “jitter” of manual stick inputs. The 3-axis gimbal (tilt: -90° to +60°, max tilt speed 100°/s, stabilization ±0.01°) ensures perfectly smooth camera movements. For even more automated results, QuickShots (Dronie, Circle, Helix, Rocket, Boomerang, Asteroid) and MasterShots (dynamic templates for portrait, close-up, long-range) execute moves with algorithmic precision.
However, understanding the “how” and “why” of each move always matters more than any automatic mode. Let's break down the 10 moves you need to master.
1. The Reveal (Epic Reveal)
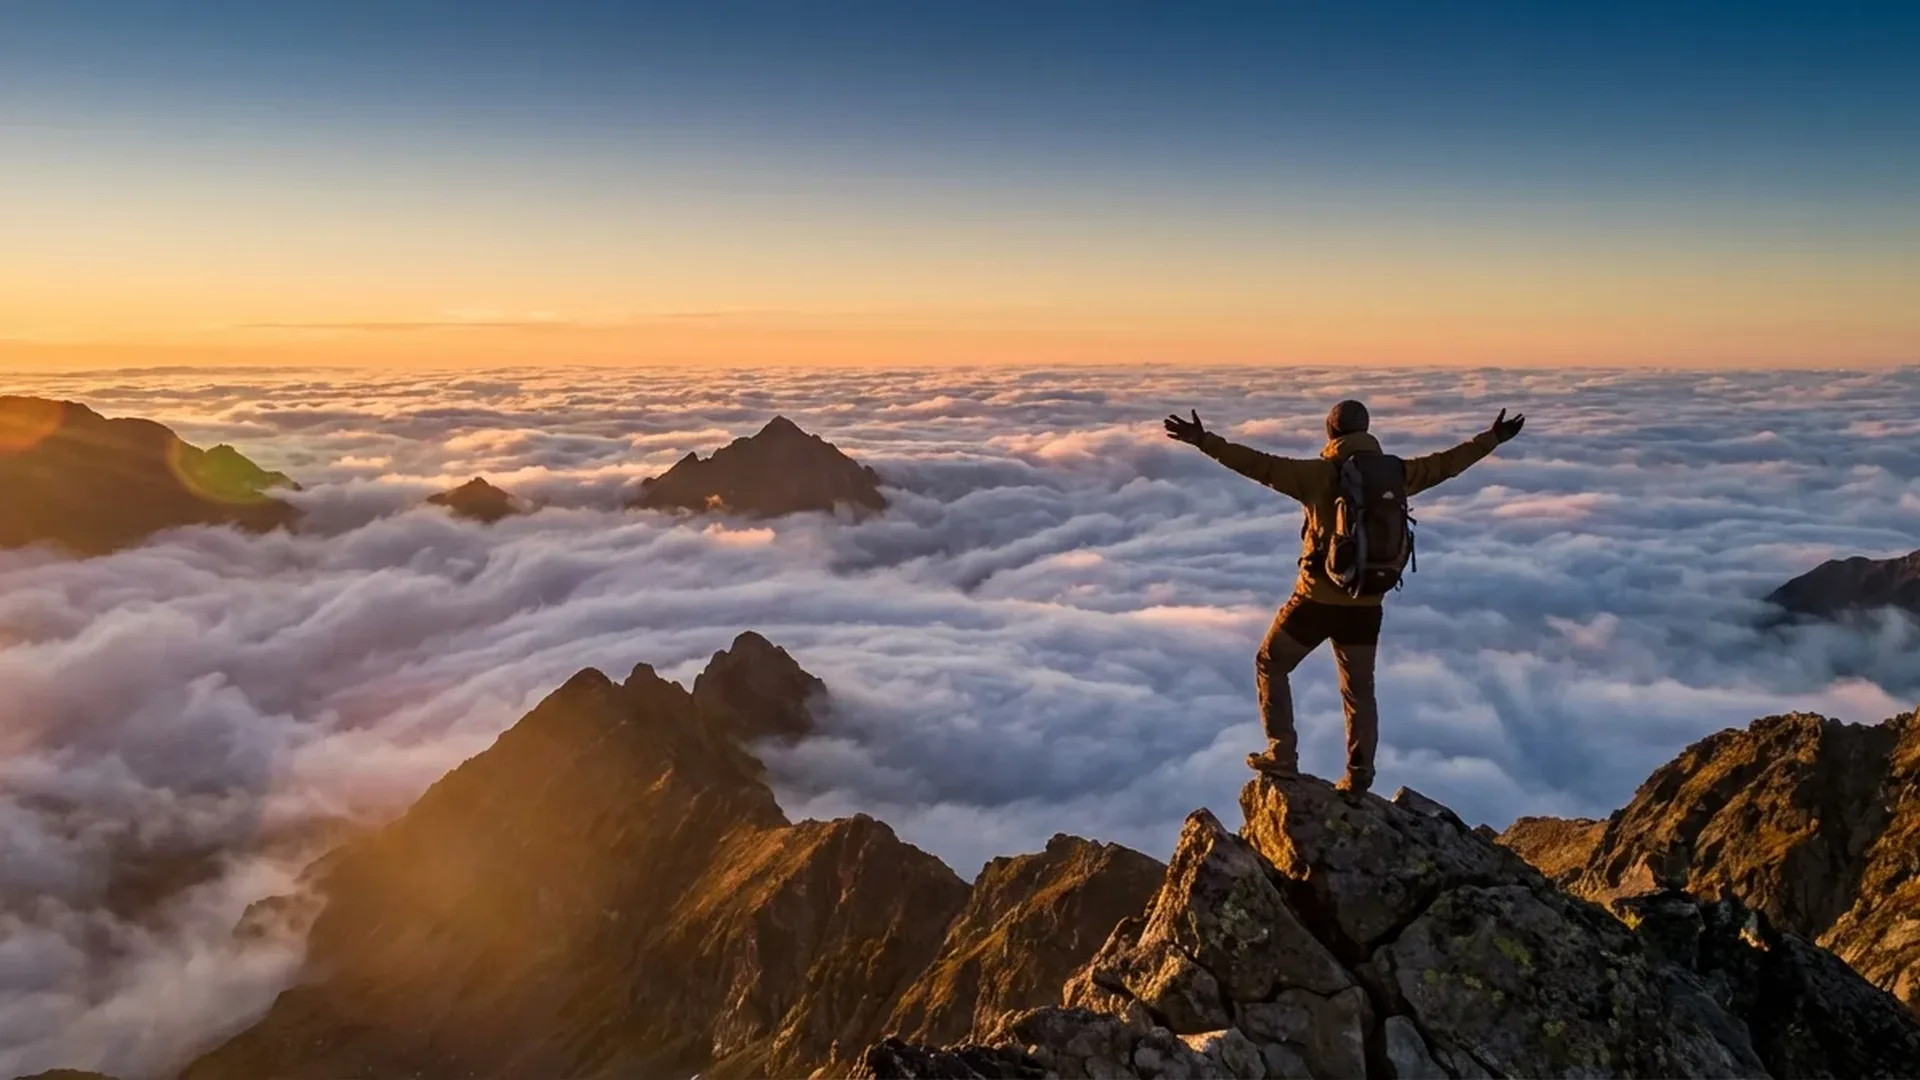
What It Is
The classic reveal shot. The drone flies low in front of an obstacle (e.g., hilltop, building edge, trees), and as it passes over, it reveals a stunning landscape or subject behind it. Tension builds in the “before,” and the reward comes in the “after.”
How to Execute
Move the drone forward while gradually ascending or tilting the gimbal downward. Speed should be consistent and relatively slow — 3-5 m/s is ideal. On the DJI Mini 4 Pro, activate Cruise Control to lock forward speed and focus solely on gimbal tilt. Switch to Cine (C) mode if available — otherwise Normal mode with gentle stick input.
Settings
- Resolution: 4K/30fps or 4K/60fps for post-production flexibility
- Color Profile: D-Log M (10-bit) for maximum dynamic range — especially when bright sky meets dark landscape
- Gimbal: Start at -30° to -45° and finish at -10° (nearly straight ahead)
- ND Filter: ND16 or ND32 on sunny days to keep shutter speed near the 180° rule (1/60 for 30fps)
Difficulty Level: Medium
Requires coordination of two axes (forward + gimbal tilt), but there's low risk if the obstacle is stationary. The APAS (automatic braking/bypass) on the Mini 4 Pro helps if you get too close.
2. The Orbit (Circle Shot)
What It Is
The drone rotates around a fixed point of interest, keeping it centered in the frame at all times. Perhaps the most reliably impressive shot — it always looks great and reveals the surrounding environment.
How to Execute
Automated: Use QuickShot Circle or ActiveTrack 360° Manual Mode. In Manual Mode, you use the dedicated control wheel to manage the circular motion, while simultaneously adjusting whether you pull in or pull away. Manual flight: Press yaw (left or right) and lateral/roll (opposite direction) simultaneously so the camera orbits around the subject. Takes practice but gives full creative control.
Settings
- Resolution: 4K/30fps (avoid 100fps unless you want slow-mo orbit)
- Gimbal: -20° to -45° depending on flight altitude relative to the subject
- Speed: Slow — 2-4 m/s for smooth results
- Tip: For building orbits, start low (10-15 m) and increase altitude every half rotation
Difficulty Level: Easy (auto) / High (manual)
Auto orbit is “press a button.” Manual execution, however, requires real dual-stick coordination skill.
3. The Dronie (Pull-Away)
What It Is
The drone version of a selfie. The drone starts close to the subject (person or object) and flies backward and upward, gradually revealing the surrounding space. A perfect opening shot.
How to Execute
Automated: QuickShot Dronie performs exactly this move. Lock the subject via ActiveTrack 360° and trigger Dronie — the drone flies back+up while keeping focus on the subject. Manual: Pull backward + ascend simultaneously while gently adjusting gimbal tilt (from -10° gradually to -30° or -45°).
Settings
- Color Profile: HLG for HDR without heavy grading afterward
- Speed: 3-5 m/s backward, 2-3 m/s ascend
- Digital Zoom: Start at 2x (4K) and gradually zoom-out to 1x during the move — adds extra dynamism
Difficulty Level: Low
The easiest move, especially in QuickShot mode. Ideal for beginners who want impressive results immediately.
4. The Fly-Through
What It Is
The drone passes through a narrow opening — bridge arch, building doorway, gap between trees, window. The most dramatic move and a favorite in professional productions. It creates the sensation of the viewer “entering” a space.
How to Execute
Manual only — no QuickShot performs fly-throughs. Maintain steady forward flight in Normal mode (or S mode if you're experienced). The gimbal should be stable at 0° (straight ahead) or slightly down (-10°). APAS on the DJI Mini 4 Pro must be disabled — otherwise it will brake or bypass instead of flying through. Use consistent speed (Cruise Control helps tremendously here).
Settings
- Resolution: 4K/60fps — smooth playback needed for fast movement
- APAS: OFF (mandatory)
- Speed: 4-8 m/s depending on the size of the opening
- Caution: Practice the exact same motion in open space first before trying the actual pass-through
Difficulty Level: Very High
Requires composure, practice, and knowledge of the drone's exact dimensions (Mini 4 Pro: 298×373×101 mm unfolded). Collision risk — always do a dry run without recording first.
5. The Bird's Eye (Top-Down)
What It Is
A vertical shot looking straight down — gimbal at -90°. Reveals patterns, geometries, and shapes invisible from ground level. Ideal for roads, beaches, fields, architectural complexes.
How to Execute
Raise the drone to the desired altitude (40-80 meters works best), lower the gimbal to -90° (straight down), and then move forward slowly. Alternatively, stay completely still and do a yaw rotation for an impressive top-down spinning shot. The Mini 4 Pro's True Vertical Shooting feature (roll -90°) enables vertical-format video ideal for Instagram Reels/TikTok.
Settings
- Gimbal: -90° exactly
- Resolution: 4K/30fps or even 48MP photo mode for topographic shots
- Speed: 1-3 m/s (very slow) or stationary + yaw rotation
- Color Profile: D-Log M for LUT-based grading in post — or Normal for instant use
Difficulty Level: Low
One of the easiest moves. The challenge is composition — what looks interesting on a map isn't always interesting in the frame.
6. The Crane (Pedestal Shot)
What It Is
A vertical rise or descent while the camera stays locked on the subject. Called “crane” because it mimics exactly what a cinema crane does — only here you don't need €50,000+ (~$54,000+) equipment.
How to Execute
Pure ascend or descend, with no forward/backward movement. Simultaneously adjust gimbal tilt to keep the subject centered. Max ascend/descend speed on the DJI Mini 4 Pro: 5 m/s (S Mode), but for cinematic results use 1-2 m/s. The ascending version reveals; the descending version focuses.
Settings
- Gimbal: Start at -10° → finish at -60° (for ascending crane)
- Ascend Speed: 1-2 m/s
- Resolution: 4K/60fps or 4K/100fps (for slow-mo reveal in post)
- Cruise Control: ON — locks vertical speed
Difficulty Level: Medium
The vertical movement is easy — the challenge is coordinating gimbal tilt in real-time so you don't “lose” the subject.
7. The Dolly (Push-In / Pull-Out)
What It Is
The most classic cinema move. Push-in: the drone slowly approaches the subject, creating tension and focus. Pull-out: slowly retreats, revealing context. The highest-paid cinematographers in the world rely on this one.
How to Execute
Simple forward or backward movement at a constant altitude, gimbal held steady. The magic is in the speed — it must be very slow and perfectly consistent. Activate Cruise Control on the Mini 4 Pro, set speed to 2-3 m/s, and let the drone do the work. Don't touch the sticks during the take. Alternatively, use ActiveTrack 360° Manual Mode — pulling in or pulling away while tracking a subject.
Settings
- Gimbal: Steady at -15° to -30° (depending on altitude/subject)
- Speed: 2-3 m/s maximum
- Digital Zoom: Start at 1x — in 4K you have zoom range 1-3x without quality loss
- Color Profile: D-Log M or HLG 10-bit
Difficulty Level: Low
Technically the easiest move — but the creative challenge (what you approach, how slow, how you exit) requires narrative thinking.
8. The Helix (Spiral Ascend)
What It Is
A combination of orbit + crane: the drone ascends in a spiral around a subject, progressively revealing more of the surrounding space. Extremely dramatic — perfect for monuments, lighthouses, buildings, rocky islets.
How to Execute
Automated: QuickShot Helix performs exactly this move — lock the subject and trigger Helix. Manual: Combine yaw + lateral + ascend simultaneously — three axes at once. This is the hardest manual drone flying maneuver.
Settings
- QuickShot Helix: Set end altitude (30-60 m above starting point)
- Gimbal: Automatic in QuickShot — for manual, start at -20° → finish at -50°
- Resolution: 4K/30fps (smoother in auto mode)
- ND Filter: ND16 or ND32 — follow the 180° rule for cinematic motion blur
Difficulty Level: Easy (QuickShot) / Very High (manual)
In auto mode, it's effortless. Manual helix execution requires months of practice to achieve smoothly.
9. The Rocket (Quick Ascent)
What It Is
A vertical launch upward — gimbal locked at -90° (straight down) while the drone ascends rapidly. Reveals the entire area in seconds — dramatic, fast, effective.
How to Execute
Automated: QuickShot Rocket. Lock subject → trigger Rocket → the drone ascends vertically while keeping camera pointed down. Manual: Gimbal at -90°, ascend 3-5 m/s, zero forward/backward/yaw. Simple but impressive.
Settings
- Gimbal: -90° locked (straight down)
- Ascend Speed: 3-5 m/s (S Mode) — faster = more dramatic
- Resolution: 4K/60fps or 4K/100fps (slow-mo rocket in post is magical)
- Final Altitude: 40-80 meters above subject
Difficulty Level: Low
One of the easiest moves — even easier in QuickShot mode. Ideal as a “guaranteed shot” at any location.
10. The Tracking Shot (Follow / Chase)
What It Is
The drone follows a moving subject — car, cyclist, boat, pedestrian — maintaining consistent distance and angle. The most “action-oriented” move. Perfect for sport, travel vlogs, real estate tours.
How to Execute
Automated: ActiveTrack 360° — the flagship tracking feature. In Auto Mode, the drone automatically plans the path around the subject. In Manual Mode, you control the angle and distance via the Manual wheel while the drone maintains focus on the subject. You can circle, pull in, pull away — whatever you want — while tracking remains active. Manual: Follow the subject in forward flight, adjusting yaw + speed in real-time.
Settings
- Resolution: 4K/60fps (mandatory — fast movement needs high frame rates)
- Subject Speed: Up to ~14 m/s (~50 km/h) for reliable ActiveTrack
- Gimbal: -15° to -30° depending on flight altitude
- APAS: ON — critical during tracking so the drone bypasses obstacles rather than stopping
- Slow-mo Option: 4K/100fps for dramatic slow-motion in post
Difficulty Level: Easy (ActiveTrack) / High (manual chase)
ActiveTrack 360° does outstanding work automatically. Manual tracking of a fast subject? Only if you're a very experienced pilot.
Bonus Tips: Elevate Your Cinematic Game
Beyond the 10 moves, several practices separate amateur from professional results:
ND Filters — the "180° Rule": In cinematic video, shutter speed should be double the frame rate (30fps → 1/60, 60fps → 1/120). This requires ND filters in bright conditions. An ND set (8/16/32/64) costs approximately €45-60 (~$49-65) for the DJI Mini 4 Pro.
D-Log M vs HLG: D-Log M 10-bit gives maximum dynamic range (ideal for color grading in post with DaVinci Resolve — free, or Studio ~€270 / ~$295 one-time). HLG 10-bit delivers satisfactory HDR look without grading — perfect for fast turnaround.
Hyperlapse Modes: The DJI Mini 4 Pro supports 4 Hyperlapse modes — Free, Waypoint, Circle, Course Lock. Ideal for establishing shots or transition scenes. Set the interval, total duration, and motion path — the drone executes automatically.
MasterShots — Automated Cinematography: MasterShots combine multiple moves into a single sequence. Choose a template (portrait, close-up, or long-range) and the drone executes a series of moves automatically. The LightCut app uses AI for auto editing, playlist matching, and aerial shot templates.
Cruise Control — Eliminate Jitter: Activating Cruise Control locks flight speed even when you release the sticks. This eliminates micro-fluctuations that create “nervous” video. Critical for reveal, dolly, and fly-through shots.
Pro Tip: Create a shot list before every flight. Write down which moves you want, in what order, with which settings. Professionals don't improvise — you can't waste the time-limited battery (34 minutes max, realistically 24-28 minutes of flight) deciding “what should I do now?”
General DJI Mini 4 Pro Cinematic Settings
Regardless of the move, these settings serve as the baseline for cinematic drone footage:
- Resolution/Frame Rate: 4K/30fps (classic cinematic feel) or 4K/60fps (versatile — can be rendered as 50% slow-mo in a 30fps timeline). 4K/100fps only when you want dramatic slow-motion — it increases file sizes significantly.
- Color Profile: D-Log M 10-bit (4:2:0) for post-production or HLG 10-bit (4:2:0) for instant HDR
- Bitrate: Maximum 150 Mbps — ensure your microSD card is V30 or faster (256GB V30 costs approximately €30 / ~$33)
- Gimbal Speed: Maximum 100°/s, but for cinematic work keep tilt speed at 10-20°/s via sensitivity settings in the DJI Fly app
- ISO: Keep low — 100-400 in daylight. Maximum usable in D-Log M: 800 (noise becomes visible above that)
- Shutter Speed: 180° rule — 1/60 for 30fps, 1/120 for 60fps, 1/200 for 100fps. ND filter use is mandatory in sunny conditions.
- White Balance: Manual — don't leave it on Auto for cinematic work. Adjust per lighting (5500-6500K for daylight, 3200-4000K for golden hour).
Cinematic Drone Equipment Costs
A complete cinematic setup based on the DJI Mini 4 Pro:
- DJI Mini 4 Pro Fly More Combo (RC 2): ~€1,010 (~$1,099) — 3 batteries, charging hub, bag, controller with screen
- ND Filter Set (ND8/16/32/64): ~€45-60 (~$49-65)
- microSD 256GB V30: ~€30 (~$33)
- DaVinci Resolve (color grading): Free (or Studio ~€270 / ~$295 one-time)
- Landing Pad: ~€15-25 (~$16-27)
- Total: ~€1,100-1,125 (~$1,197-1,224) for a complete cinematic kit
For under €1,150 (~$1,250), you get equipment that 5 years ago would have cost €5,000+ (~$5,400+) — and weighed 2-3 kg instead of 249 g.
Best Locations for Cinematic Drone Moves
Greece is a natural studio for cinematic drone work. Certain locations pair perfectly with specific moves:
- Reveal: Meteora — fly behind a rock, reveal the monastery
- Orbit: Cape Sounion Lighthouse — 360° orbit around the Temple of Poseidon
- Dronie: Santorini (Oia) — pull-away revealing the Caldera
- Fly-Through: Corfu (Liston) — pass through arcade arches
- Bird's Eye: Thessaloniki (White Tower) — patterns of the square and coastline
- Crane: Acropolis (from a legal launch point) — ascending crane reveal
- Dolly: Nafplio (Bourtzi) — push-in toward the sea fortress
- Helix: Monemvasia — spiral ascend around the rock
- Rocket: Any Greek beach — vertical ascend revealing turquoise waters
- Tracking: Peloponnese (coastal roads) — follow a car along cliff roads
"A director doesn't tell the camera to 'shoot video' — they say 'reveal,' 'approach,' 'follow,' 'abandon.' That's exactly what cinematic drone moves are: directorial commands translated into motion."