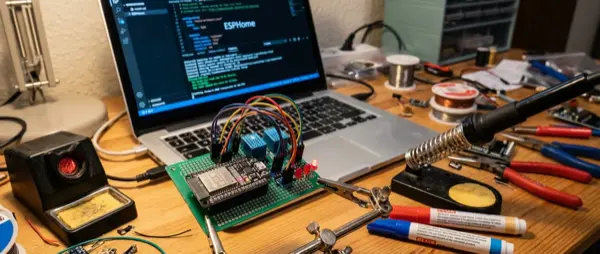
If you feel limited by off-the-shelf smart home devices, ESPHome is your answer. It's an open-source framework that lets you create your own IoT devices using ESP32/ESP8266 microcontrollers and simple YAML files — without writing a single line of code. In this guide, we'll explore what ESPHome is, how it works, how to get started, and what projects you can build.
🔧 What Is ESPHome?
ESPHome is a tool that converts YAML configuration files into firmware for ESP32 and ESP8266 microcontrollers. You write a YAML file describing the sensors, relays, LEDs, and automations you want, and ESPHome compiles and uploads the code to the microcontroller via USB or OTA (Over-The-Air). Integration with Home Assistant is automatic and bidirectional.
⚡ Why ESPHome?
- No coding: YAML only — no C++ or Arduino IDE needed
- Local control: 100% cloud-free — data stays in your home
- Hundreds of sensors: Supports 500+ sensors, switches, displays
- OTA Updates: Update devices wirelessly
- Cost: ESP32 board + sensor = under €10
🛠️ What You Need to Get Started
Hardware
| Component | Price | Notes |
|---|---|---|
| ESP32 DevKit V1 | €4-8 | WiFi + Bluetooth, 30+ GPIO pins |
| ESP32-C3 Mini | €3-5 | Smaller, fewer pins, low power |
| ESP8266 (NodeMCU) | €2-4 | Older, WiFi only, fine for basic projects |
| Breadboard + jumper wires | €3-5 | For prototyping |
| Sensor (e.g. BME280) | €3-7 | Temperature, humidity, barometric |
Software
- 💻 Home Assistant: For managing ESPHome (or standalone via CLI)
- 🌐 ESPHome Dashboard: Web interface via Home Assistant add-on
- 📝 Text editor: VSCode with YAML extension (optional)
- 🔌 USB cable: micro-USB or USB-C depending on board
📋 First Project: Temperature + Humidity Sensor
Let's build your first sensor step by step. We'll use ESP32 + BME280 (temperature, humidity, barometric pressure).
Step 1: Install ESPHome
In Home Assistant, go to Add-ons → ESPHome and click Install. Then Start. The ESPHome Dashboard will appear.
Step 2: Create a New Device
Click “New Device”, give it a name (e.g. bedroom-sensor), select ESP32. ESPHome automatically generates a base YAML file.
Step 3: Connect the BME280
Connect the BME280 to the ESP32 via I2C: SDA → GPIO21, SCL → GPIO22, VCC → 3.3V, GND → GND. Then add to your YAML:
📝 YAML Configuration
i2c: — enables the I2C bussensor: — defines the BME280 sensor- platform: bme280 — sensor typetemperature: name: “Bedroom Temperature” — entity namehumidity: name: “Bedroom Humidity”pressure: name: “Bedroom Pressure”update_interval: 60s — refreshes every 60 seconds
Step 4: Upload Firmware
Connect the ESP32 via USB, click “Install” on the dashboard, select “Plug into this computer”. After the first installation, all future updates happen wirelessly (OTA).
Step 5: Integrate with Home Assistant
Home Assistant automatically detects the new device. Click “Configure”, and the sensors appear instantly on your Dashboard!
🏗️ 5 Popular ESPHome Projects
- 🌡️ Weather station: BME280 + photoresistor + anemometer — a full weather station for under €20
- 💡 Smart relay: ESP32 + relay module — turns any “dumb” device smart (e.g. lamp, coffee maker)
- 🚪 Door/window sensor: Reed switch + ESP32-C3 with battery — sends open alerts
- 🔊 Alert buzzer: Piezo buzzer → beeps when you leave the fridge open for 2+ minutes
- 📺 Smart display: ESP32 + 0.96″ OLED → shows temperature, time, Home Assistant notifications
⚡ Advanced Features
- Bluetooth Proxy: Turns the ESP32 into a Bluetooth proxy for Home Assistant — scans BLE devices throughout the house
- Deep Sleep: For battery-powered projects — the microcontroller sleeps and wakes only for measurements
- Lambda (C++): If you need custom logic, you can inject C++ directly into the YAML
- Web Server: Every ESPHome device can run a local web server — view sensor readings without Home Assistant
- Voice Assist: Microphone + speaker on ESP32-S3 → local voice assistant
💰 Cost vs Commercial Solutions
| Device | ESPHome DIY | Commercial Solution |
|---|---|---|
| Temperature sensor | €7-10 | €25-40 (Aqara/Sgreverse) |
| Smart relay | €5-8 | €15-25 (Shelly/Sgreverse) |
| Door sensor | €4-7 | €20-30 (Aqara) |
| mmWave presence | €12-18 | €30-50 (Aqara FP2) |
✅ Pros
- ✔️ 100% local control — no cloud, no subscriptions
- ✔️ Extremely low cost per device
- ✔️ Full customization — build exactly what you need
- ✔️ Automatic Home Assistant integration
- ✔️ Active community with hundreds of configurations
- ✔️ OTA updates without physical access
❌ Cons
- ✖️ Requires basic electronics knowledge (soldering, GPIO)
- ✖️ Initial setup more time-consuming than plug-and-play solutions
- ✖️ No Zigbee/Thread — WiFi only (and passive BLE)
- ✖️ WiFi battery consumption — not ideal for battery use without deep sleep
🏁 Conclusion
ESPHome is arguably the most powerful DIY smart home tool available today. It gives you full control, zero cloud subscriptions, and the ability to build any IoT project you can imagine for under €10. If you have Home Assistant and want to take your home automation to the next level, start with an ESP32 and a BME280 — you'll be surprised how easy and addictive it is.