The Raspberry Pi is the world's most popular DIY smart home platform — and for good reason. At a cost of €40-80, you can set up a complete smart home hub that replaces €200+ commercial solutions. In this guide we explain how to install Home Assistant, connect sensors, and create automations — step by step.
📖 Read more: Home Assistant 2026: Complete Beginner Setup Guide
Which Raspberry Pi to Choose
| Model | RAM | Price | Suitable For |
|---|---|---|---|
| Raspberry Pi 5 (8GB) | 8GB | ~€80 | Full smart home, 50+ devices |
| Raspberry Pi 5 (4GB) | 4GB | ~€60 | Small-medium smart home |
| Raspberry Pi 4 (4GB) | 4GB | ~€45 | Budget setup, 20-30 devices |
| Raspberry Pi 4 (2GB) | 2GB | ~€35 | Basic setup, few devices |
2026 Recommendation: Raspberry Pi 5 (4GB) for most users. The improved CPU and PCIe bus make a huge difference in performance. You'll also need: a microSD card (32GB+), a USB-C 5V/5A power supply, and a case with passive cooling.
Installing Home Assistant
The installation steps are straightforward:
- Step 1: Download Raspberry Pi Imager (free, from rpi.org)
- Step 2: Select “Other specific-purpose OS” → “Home assistants” → “Home Assistant”
- Step 3: Select microSD card, click Write. Wait 5-10 minutes for completion
- Step 4: Insert card into Pi, connect Ethernet cable + power supply
- Step 5: Wait 10-20 minutes, then open http://homeassistant.local:8123
- Step 6: Create account, configure location/timezone settings
After initial setup, Home Assistant will automatically discover compatible devices on your network. The HAOS (Home Assistant OS) installation method is the easiest and most recommended approach for beginners. You can manage everything through a clean web interface from any browser on your local network.
Essential Accessories
- Zigbee USB Dongle (Sgreverse ZBDongle-E): ~€15 — for connecting Zigbee devices without a cloud hub
- SSD instead of microSD: ~€20 — dramatically more reliable and faster storage medium
- USB Bluetooth adapter: ~€10 — if you need BLE devices connectivity
- PoE HAT: ~€20 — power via Ethernet, one less power outlet needed
- UPS / Power bank: ~€15 — protection from power outages
Replacing microSD with SSD via USB 3.0 adapter (€5) is the first upgrade you should make for reliability.
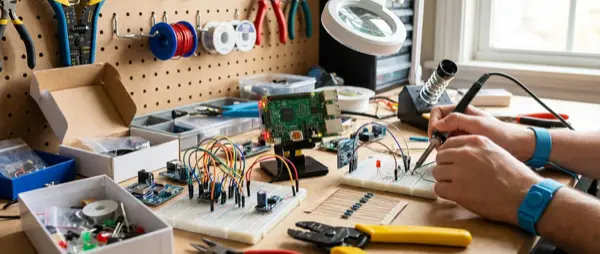
DIY Sensors with ESP32
With ESPHome (built into Home Assistant) you create custom sensors in minutes:
- Temperature/Humidity (DHT22): ESP32 + DHT22 = €5 total. A sensor for every room in your home
- Motion Sensor (PIR): ESP32 + HC-SR501 = €4. Motion detection for lighting automations
- Door/Window Sensor: ESP32 + magnetic reed switch = €3 for security monitoring
- Light Sensor: ESP32 + LDR = €3. Automatic lights on/off based on natural light levels
- CO2/Air Quality Sensor: ESP32 + MH-Z19B = €18. Indoor air quality monitoring
Each ESP32 board costs ~€3-5 and is programmed via YAML in the ESPHome GUI — no coding knowledge required. Flash it, it connects to WiFi, and appears automatically in HA. This is the most affordable way to implement smart home monitoring throughout your house.
Home Assistant Automations
After connecting devices, create automations via GUI (Settings → Automations & Scenes). The first ones should be simple and reliable:
- Lights turn on automatically at sunset, off at midnight — no buttons needed at all
- Motion-activated lighting in hallway, bathroom, and storage room — saves electricity
- Phone notification if room temperature drops below 18°C or rises above 28°C
- AC turns off automatically if a window opens (window sensor trigger)
- Morning routine: kitchen lights + thermostat boost + coffee maker smart plug at 07:00
- Goodnight scene: all lights off, door locked, alarm mode activated
Must-Install Add-ons
The most useful Home Assistant add-ons for Raspberry Pi:
- ESPHome: Manage ESP32/ESP8266 sensors from within HA GUI
- Mosquitto MQTT Broker: Local MQTT broker for Zigbee2MQTT, Shelly, etc.
- Zigbee2MQTT: Connect Zigbee devices without a cloud bridge
- File Editor / VS Code: Edit configuration YAML from within the browser
- Google Drive Backup: Automatic weekly backup to the cloud
- HACS: Community store with hundreds of custom integrations and lovelace cards
Backups and Reliability
Your smart home hub is critical — if it fails, you lose hours of configuration work. Essential practices:
- Automatic weekly backup via Google Drive or Samba add-on
- Use SSD instead of microSD to avoid data corruption issues
- UPS for protection against sudden power outages
- Update HA only after backup — never immediately after release, wait 2-3 days for bug reports
Conclusion
A Raspberry Pi with Home Assistant is the heart of the perfect DIY smart home. With a total cost of €100-150 (Pi + dongle + SSD + sensors) you get a system that surpasses commercial hubs worth €300+. Local control, complete privacy, unlimited expandability — no cloud-based system offers all of these. If you love DIY projects, this is the ultimate hobby-meets-utility project.