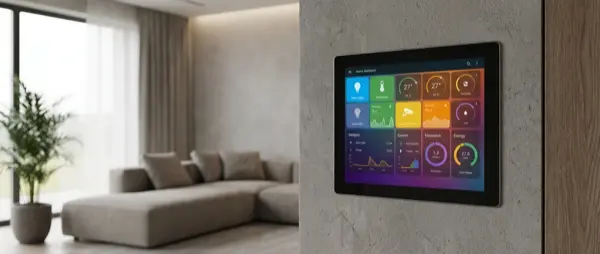
A wall-mounted smart home dashboard transforms home control into a visual experience. Instead of opening apps on your phone, you see everything in front of you — temperature, lights, cameras, energy consumption, calendar. You create a custom control center exclusively for your home. In this guide, we'll walk through step by step how to build a DIY wall-mounted dashboard with a tablet, which software to use, and how to make it look professional.
📖 Read more: Raspberry Pi Smart Home: DIY Guide 2026
Which Tablet to Choose
You don't need an expensive tablet — the dashboard simply runs a webpage in fullscreen. Key criteria: 8-10 inch screen, always-on capability, good viewing angles.
| Tablet | Screen | Always-On | Price | Rating |
|---|---|---|---|---|
| Amazon Fire HD 10 | 10.1″ IPS | Show Mode | ~€120 | ⭐ 9/10 |
| Samsung Galaxy Tab A8 | 10.5″ TFT | Via app | ~€170 | ⭐ 8.5/10 |
| Lenovo Tab M10 | 10.1″ IPS | Via app | ~€140 | ⭐ 8/10 |
| iPad (9th gen) | 10.2″ Retina | Guided Access | ~€280 | ⭐ 8.5/10 |
| Amazon Fire HD 8 | 8″ IPS | Show Mode | ~€85 | ⭐ 7.5/10 |
Recommendation: Amazon Fire HD 10 — best value for money, native Show Mode for always-on, easy browser installation via sideloading. For premium results, iPad with Guided Access looks exceptional.
Software: Which Dashboard to Build
Home Assistant Dashboard (Lovelace)
The most popular choice. If you already run Home Assistant, you can create dashboard views easily with the drag-and-drop editor or YAML. Cards for temperature, lights, cameras, energy charts, buttons, maps. Supports custom themes, modern appearance, responsive layout. Access via browser or companion app.
📖 Read more: Smart Home DIY: Building on a Small Budget
HADashboard (AppDaemon)
Designed specifically for wall tablets. Full-screen widgets, large buttons, visible from a distance. Ideal if you want a dedicated dashboard without scrolling. Configuration via YAML, less visual editing but very clean results.
Tileboard
Custom tile-based dashboard for Home Assistant. Fully customizable HTML/CSS/JS. Each tile shows an entity, camera, chart, or schedule. More technical setup but perfect aesthetics if you know basic HTML.
Dakboard / MagicMirror²
If you don't have Home Assistant: Dakboard displays calendar, weather, photos, news — cloud-based. MagicMirror² runs on Raspberry Pi with modules for smart home, transit, tasks. Neither directly controls devices, they only display information.
Step-by-Step Installation
Step 1: Tablet Preparation
Enable developer options on your Android tablet. Install Fully Kiosk Browser (€5.90 license, worth it) — it locks the tablet to one page, controls brightness, wake on motion, screensaver, and remote admin. Alternative: WallPanel app (free). On iPad, use Guided Access (Settings → Accessibility).
📖 Read more: Home Assistant vs Google Home: Comparison 2026
Step 2: Wall Mount
Mounting options: 3D-printed frame (Thingiverse/Printables — free STL files for every tablet model), VidaMount/TabDock commercial mount (€30-50), or flush mount in wall (requires cutout). Place near an outlet or run USB cable through the wall for a clean installation. Height: 140-150 cm from floor (eye level).
Step 3: Power Supply
Permanent USB power — don't rely on battery. Use a flat USB cable behind the wall or a cable channel. For long-term battery health, set charge limit to 80% (Fully Kiosk Browser supports this, or AccuBattery app). Alternatively, a smart plug timer can charge only at night.
Step 4: Dashboard Setup
In Home Assistant → Settings → Dashboards → Create new dashboard. Add views: Main (temperature + lights), Security (cameras + alarm), Energy (charts), Media (music + TV). Use Mushroom Cards (custom HACS component) for modern UI, or “Catppuccin” theme for dark mode aesthetics.
Design Tips for Professional Results
Always use dark theme: On a wall tablet, a dark background reduces glare, saves energy on OLED, and looks much more modern. Use a dark background (#1a1a2e or #0f0f23) with colored accents.
📖 Read more: Node-RED Automations: Smart Home Guide
Large elements: Buttons at least 60x60px, fonts 18px+, spacing between cards. You need to be able to tap easily without precision — don't build “a phone on the wall,” build a control panel.
Motion-activated screen: Set Fully Kiosk to turn on the screen with motion detection (via camera) or proximity sensor. Brightness at 30-40% at night, 80% during the day. Screensaver with clock or family photos.
Sections per room: Each view = one room or category. Main page shows highlights (temperature, who's home, alarm status). Swipe for details.
Advanced Features
Camera feeds: Embed live camera streams in the dashboard (Picture Glance card or custom iframe). RTSP streams via Frigate or go2rtc show real-time video.
📖 Read more: Smart Home Automations: 20 Ideas for Your Home
Floor plan: Create a floor plan of your house as a background image and place interactive icons on each room. Tap the living room → lights turn on. Home Assistant picture-elements card does exactly this.
Voice control integration: Add a microphone to the tablet for voice commands via Assist (Home Assistant) or Alexa. The dashboard becomes a voice assistant simultaneously — a DIY Echo Show.
Notification popups: Doorbell ring → screen turns on automatically with a live feed from the door camera. Alarm trigger → fullscreen red notification. Use browser_mod integration for popup automations.
DIY Dashboard Cost
| Component | Budget Option | Premium Option |
|---|---|---|
| Tablet | Fire HD 10 — €120 | iPad 10.2" — €280 |
| Wall Mount | 3D printed — €5-10 | VidaMount — €45 |
| Software | Home Assistant (free) | HA + Cloud (€65/year) |
| Kiosk App | WallPanel (free) | Fully Kiosk — €6 |
| Cables/Adapter | USB cable — €8 | In-wall USB — €25 |
| Total | ~€140 | ~€420 |
Conclusion
A DIY smart home wall dashboard is a project you can complete in one weekend. It doesn't require a large budget (€140 is enough) and the result fundamentally changes how you interact with your home. Start with a basic Home Assistant dashboard, add Mushroom Cards for a great appearance, and gradually build floor plans, camera views, and custom automations. The wall-mounted tablet becomes the central nervous system of your smart home — and it impresses every visitor who sees it.